At first, understanding crochet patterns can look like a jumble of letters, numbers, and symbols and you may feel lost trying to understand what “ch 3, turn” really means, you’re not alone! Many beginners find crochet patterns confusing and intimidating. The strange language and complicated instructions can make you feel like you need a secret decoder ring just to make a simple scarf.
Imagine trying to follow a pattern, only to end up with something completely different from what you expected. The frustration of misreading instructions, making mistakes, and not knowing how to fix them can make you want to give up on crochet altogether. You might even feel like you’re not “crafty” enough to understand these complicated patterns.
But fear not! This beginner’s guide is here to help you crack the code of crochet patterns. We’ll break down the essential elements, explain common abbreviations, and show you how to read charts. You’ll learn to understand pattern layout, identify repeats, and even check your gauge. With this guide, you’ll gain the confidence to tackle any crochet pattern and create beautiful projects. Let’s turn those confusing patterns into clear, easy-to-follow instructions and unlock your crochet potential!
Table of Contents
Why Understanding Crochet Patterns Seem Like a Secret Code (and How to Crack It!)
Crochet patterns often look like a jumble of letters, numbers, and symbols. This can make them seem like a secret code that only expert crocheters can understand. But don’t worry! These patterns are actually a shorthand way to describe how to make a project.
The reason patterns use this “code” is to save space and make instructions clearer. Instead of writing out “double crochet” every time, patterns use “dc”. This makes patterns shorter and easier to follow once you know what the abbreviations mean. It’s like learning a new language, but one that’s all about creating beautiful crochet projects.
To crack this code, you just need to learn some basic abbreviations and symbols. Once you do, you’ll find that patterns become much easier to read. It’s like having a key to unlock a treasure chest of crochet designs. With practice, you’ll be reading patterns like a pro in no time!
Understanding Basic Pattern Layout
Crochet patterns have a specific layout that helps you follow along step by step. Most patterns start with information about the materials you’ll need and the size of the finished project. This helps you gather everything before you begin.
Next, you’ll find the actual instructions. These are usually divided into rows or rounds, depending on how the project is made. Each row or round is numbered, making it easy to keep track of where you are. The pattern will tell you how many stitches to make and what kind of stitches to use.
Some patterns also include charts. These are visual guides that show you what the stitches look like. Charts are especially helpful for complex patterns or when you’re working in rounds. They let you see how the stitches fit together, which can make the pattern easier to understand. Understanding the basic layout of patterns will make reading them much easier. For example, if you’re looking for a project that walks you through crocheting a cosy throw blanket for your sofa!
Must-Know Crochet Abbreviations
Crochet patterns use lots of abbreviations to save space. Learning these can make reading patterns much easier. Here are some of the most common ones you’ll see:
- Ch: Chain
- Sc: Single crochet
- Dc: Double crochet
- Hdc: Half double crochet
- St(s): Stitch(es)
- Sl st: Slip stitch
- Rep: Repeat
These abbreviations are like building blocks for your crochet projects. For example, “Ch 3, dc in next st” means “Chain 3, then make a double crochet in the next stitch.” As you practice, these abbreviations will become second nature.
Remember, it’s okay to keep a list of abbreviations handy while you’re learning. Many patterns include a key that explains what each abbreviation means. Don’t be afraid to refer to it often. With time and practice, you’ll find yourself needing it less and less.
Demystifying Stitch Instructions
Stitch instructions in crochet patterns can seem like a secret code at first. But once you break them down, they’re actually quite simple. Let’s look at an example: “sc in 2nd ch from hook and in each ch across”. This means you should make a single crochet in the second chain from your hook, then continue making single crochets in each chain to the end of the row.
Why skip the first chain? It’s to keep your edges neat. If you try to work into that first chain, you’ll see why it doesn’t work well. As you follow the instructions, count your stitches carefully. Don’t count the loop on your hook or the slip knot at the end of the row. This helps you stay on track and make sure your project turns out the right size.
Sometimes, patterns use shorthand for common stitch combinations. For example, “dc in 4th ch from hk (ch-3 counts as dc)” means you should double crochet in the fourth chain from your hook, and the first three chains you made count as your first double crochet stitch. With practice, you’ll start to recognize these common instructions and your crocheting will become faster and easier.
Recognizing and Following Repeats
Repeats are a common feature in crochet patterns. They help save space and make patterns easier to follow. You’ll often see repeats marked with square brackets [ ] or asterisks *. For example, “[dc in next 4 sts, 2 dc in next st] around” means you should double crochet in the next 4 stitches, then make 2 double crochets in the next stitch. Then you repeat this whole sequence until you reach the end of the round.
Repeats can also be used for entire rows or rounds. You might see instructions like “Rep Rows 2-5 three times”. This means you should repeat the instructions for Rows 2 through 5 a total of three times. It’s a shortcut that helps you create patterns or textures in your work without writing out every single row.
When working with repeats, it can be helpful to use stitch markers. Place a marker at the beginning of each repeat section. This way, you can easily keep track of where you are in the pattern. Remember, practice makes perfect. The more you work with repeats, the easier they’ll become to recognize and follow.
How to Read Crochet Charts (Visual Learners, Rejoice!)
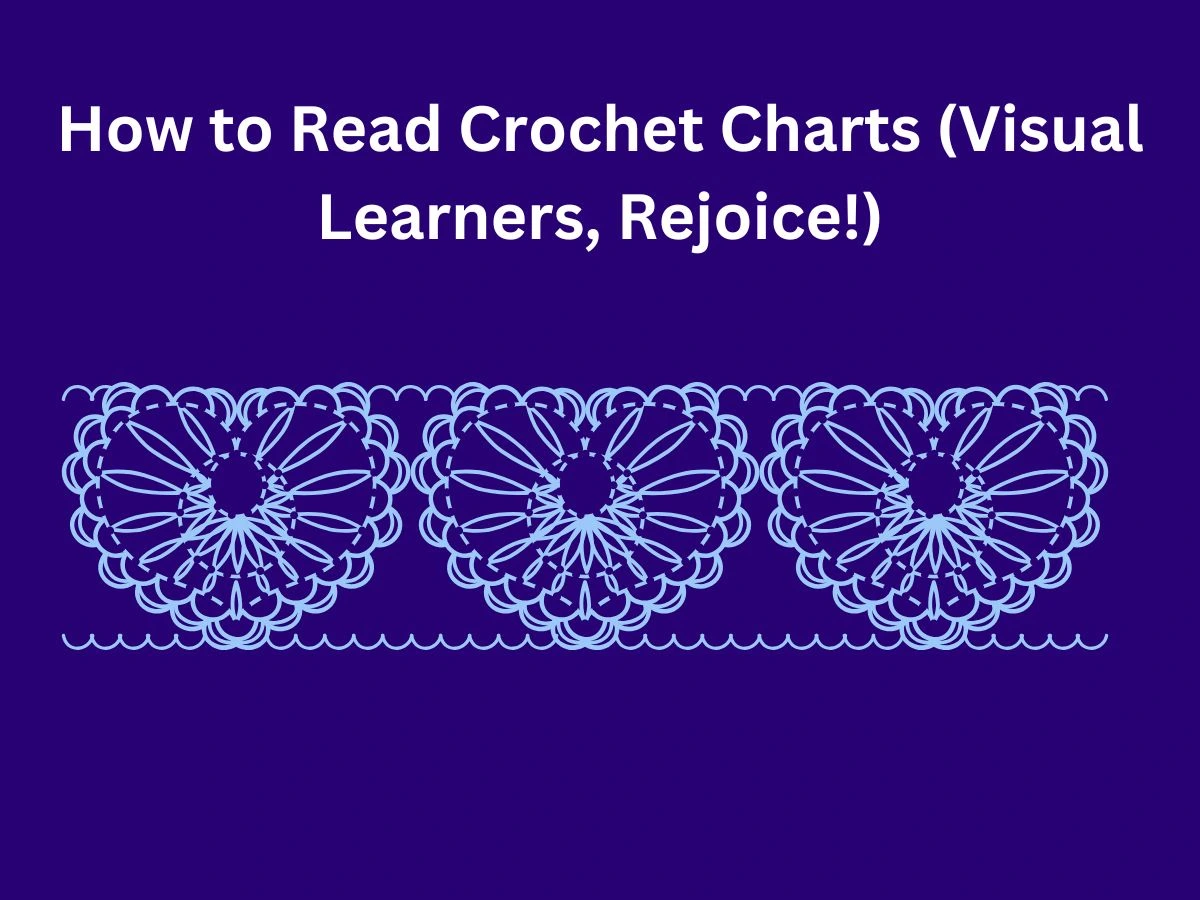
Crochet charts are a visual way to represent patterns. They use symbols to show different stitches, making it easier for visual learners to understand the pattern. Each symbol represents a specific stitch, like a ‘V’ for single crochet or a ‘T’ for double crochet. The chart’s legend or key explains what each symbol means.
To read a chart, start at the bottom right corner for right-handed crocheters. This is usually marked as Row 1 or the Foundation Row. Work from right to left for the first row, then left to right for the second row, and so on. This zigzag pattern continues up the chart. For projects worked in the round, start at the center and work outwards in a spiral.
Charts often use colors to make them easier to read. Right Side rows are usually in black, while Wrong Side rows are in blue. Yellow or red outlines often show repeat sections. Some charts use numbers to mark rows or rounds. Don’t worry if this seems complicated at first. With practice, you’ll find that charts can make complex patterns much easier to understand and follow. Charts are a fantastic way for visual learners to understand crochet patterns. Once you’re ready to move on to stylish projects, you can perhaps start moving onto more stylish projects, such as wearable crochet pieces for your wardrobe!
Gauging Your Gauge: Why It Matters
Gauge is the measurement of how many stitches and rows fit into a specific area, usually 4 inches by 4 inches. It ensures your project turns out the correct size and uses the right amount of yarn. If your gauge doesn’t match the pattern, your project could end up too big, too small, or you might even run out of yarn before finishing.
To measure your gauge, create a swatch using the recommended hook size and yarn from the pattern. Count the stitches and rows within the specified area. If your swatch doesn’t match, adjust by switching to a larger hook if your stitches are too tight or a smaller hook if they’re too loose. This simple step can save you hours of frustration later.
Gauge is especially important for items like sweaters, hats, or gloves where fit matters. For blankets or scarves, a slight difference in size might not be as critical. Taking the time to check your gauge before starting ensures your project will look and fit as intended, making it worth the extra effort.
Tips for Spotting and Correcting Errors
Mistakes happen to everyone, even experienced crocheters. The key is learning how to spot and fix them. One common error is losing or gaining stitches, which can make your project uneven. To avoid this, count your stitches at the end of each row or round to ensure you’re on track.
Another frequent issue is crocheting too tightly or loosely, which affects the overall look and size of your project. If you notice uneven tension, take a break and try to relax your hands while crocheting. Using a consistent grip on your yarn can help improve tension over time.
If you do make a mistake, don’t panic! Frogging (undoing stitches) is a normal part of crochet. Carefully pull out the stitches until you reach the error, then start again from that point. Mistakes are part of the learning process, so embrace them as opportunities to improve your skills.
Where to Find Beginner-Friendly Patterns
Finding beginner-friendly crochet patterns can make all the difference when you’re starting out. Websites like Yarnspirations, Hobbii, and EasyCrochet offer free patterns specifically designed for beginners. These patterns often include clear instructions and simple designs to help you build confidence.
Platforms like Ravelry and LoveCrafts also have extensive collections of patterns that cater to all skill levels. You can filter by difficulty level to find projects that match your experience. Many of these sites also include reviews and tips from other crocheters, which can be incredibly helpful as you work through a pattern.
For those who prefer visual learning, YouTube tutorials often pair video demonstrations with downloadable patterns. Watching someone else crochet can make it easier to understand tricky steps. With so many resources available online, you’ll have no trouble finding patterns that inspire you while helping you grow as a crocheter!
Final Thoughts
With these strategies in hand, you’re now prepared to tackle even the trickiest crochet patterns. Start putting this knowledge to use; the more you practice reading and understanding patterns, the easier it will become. Remember that every project is a chance to grow and refine your abilities.
Don’t let any complicated-looking pattern scare you away. With patience and the tools you’ve gained here, you can bring countless designs to life. If you ever need further guidance or have any questions, don’t hesitate to contact me at info@madeehamedia.com. Happy crocheting!
Frequently Asked Questions
Q1: What do I do if a pattern uses abbreviations I don’t know?
A: Most patterns include a key that explains all the abbreviations used.
Q2: How do I know what materials I need for a project?
A: Patterns usually list the required materials, including yarn type, hook size, and other tools.
Q3: What’s the best way to keep track of where I am in a pattern?
A: Use stitch markers to mark the beginning of each repeat or row.
Q4: How important is it to check my gauge?
A: Checking your gauge is essential for ensuring your project turns out the correct size.
Q5: What if my gauge doesn’t match the pattern?
A: Adjust your hook size to achieve the correct gauge.
Q6: What’s the best way to correct a mistake in my crochet?
A: Carefully undo your stitches (frog it) until you reach the mistake, then start again.
Q7: Where can I find patterns that are easy for beginners?
A: Websites like Yarnspirations, Hobbii, and EasyCrochet offer beginner-friendly patterns.
Q8: What are crochet charts and how do I read them?
A: Crochet charts are visual representations of patterns that use symbols to show stitches.
Q9: What if I have trouble understanding a pattern’s instructions?
A: Try watching a video tutorial or asking for help in an online crochet community.
Q10: What should I do if I run out of yarn in the middle of a project?
A: Buy more yarn of the same dye lot to ensure consistent color throughout your project.